You’re considering having a geothermal HVAC system installed for your home. Great! We strongly encourage taking this step for a more energy efficient and environmentally sustainable way to provide year-round comfort to your home. Geothermal heat pumps work at high efficiency in all seasons, regardless of the temperature on the surface.
Now you’ll start to wonder what goes into a geothermal installation in Toledo, OH. You’ve come to the right people: we’re your reliable geothermal professionals in the area, and we’d love to outfit your home with one of these systems.
Let’s go over a list of the steps we take to install a geothermal system.
Step 1: Site analysis
Once you contact us, we’ll come to your home and property to analyze it and see if geothermal will work with it. We will also determine what type of loop system to use. For example, if there’s less available space, we’ll need to use a vertical loop configuration rather than a standard horizontal field. We’ll also check on the comfort requirements of the house and the location of nearby utilities.
Step 2: Loop design
We now create the design of the loops to match our analysis of the site. We take into account the soil type (which affects heat transfer), the comfort demands of the house, and the size the loops will need to be. We also need to properly size the system so that it’s neither too big nor too small.
Step 3: Permits
Geothermal installations must meet local codes and regulations, and we must have a permit to perform the job. Don’t worry, we’ll handle all this for you.
Step 4: Drilling and loop field installation
This is where the bulk of the work takes place, and it will differ depending on the type of loop configuration we designed for the house: horizontal or vertical.
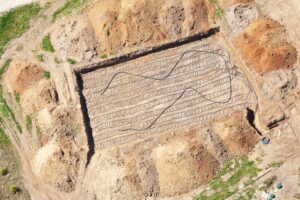
For a horizontal loop field, we’ll excavate trenches onto the property that allow us to place the loops down at least six feet below the frost line, which is the point where the loops can use the stable energy of the earth. For vertical loops, we need to dig deep boreholes that we’ll then lower the loops into. These can be from 150 to 200 feet deep, and we use special drills to quickly create these holes.
Step 5: Installing the heat pump
The outdoor loops are now in place, but you still need the actual heat pump indoors that will use the thermal energy drawn and removed by the loops. This process is similar to installing a standard air-source heat pump: it uses a blower fan and refrigerant coils and connects to existing ductwork. If you already have a heat pump in place, we’ll remove it and make the retrofit adjustments necessary to adapt to using ground loops.
Step 6: Testing and commissioning
We’re almost ready to go! All we have left to do is test the system to ensure it’s working correctly: pressure, flow rate, and amperage. We then commission the geothermal system, which is a fancy way of saying that we balance fluid flow and make final control adjustments so the system can get to work.

